
The grade you assign to a vintage shoe should be set by its worst defect, not its average condition, and you find that defect by checking three zones every time: the outsole, the upper, and the interior. A pair with a flawless upper but a crumbling insole board grades as if it had the crumbling insole, full stop. The method below walks through each zone and gives you a repeatable workflow for single pairs and wholesale lots alike.
TL;DR:
- Grading should always reflect the shoe’s worst defect, with interior deterioration, especially crumbling insole boards, lowering the overall grade regardless of exterior appearance.
- Exterior checks focus on outsole tread depth and heel drag, while interior inspection emphasizes lining tears, insole softness, and odor, as internal issues often determine the final grade.
- Polyurethane midsoles are the most susceptible to hydrolysis, which causes crumbling and caps the shoe’s grade, especially in models from the 1970s to 1990s.
- Consistent, repeatable inspection workflows and conservative grading practices reduce disputes and ensure reliable quality assessments across individual pairs and wholesale lots.
- Including detailed defect documentation, such as interior photos and clear notes on structural issues, helps protect both sellers and buyers by setting accurate expectations.
Table of Contents
- 1. Understand the condition ladder before you grade
- 2. Run the exterior and packaging checklist
- 3. Inspect the interior where grades are actually decided
- 4. Watch for material and era red flags
- 5. Follow a repeatable workflow for pairs and lots
- 6. Photograph and disclose defects the right way
- 7. What bulk inspection at scale teaches you about grading
- 8. Where to source inspected vintage shoe lots
- 9. Why conservative grading protects every sale
- 10. Primary sources and further reading
- Sources
- FAQ
1. Understand the condition ladder before you grade
Most resale markets use a seven-rung ladder: deadstock, very near deadstock (VNDS), excellent, good, fair, heavy wear, and beater. Each rung describes a specific range of wear, and buyers expect sellers to apply it consistently rather than invent their own labels.
- Deadstock means unworn, with original packaging and no signs of handling beyond shelf wear.
- VNDS allows minor try-on marks but no outdoor wear, and definitions vary enough between platforms that you should state your own criteria in the listing.
- Excellent and good cover shoes with visible wear that has not compromised structure.
- Fair and heavy wear signal functional but cosmetically tired pairs.
- Beater covers shoes kept for parts, display, or hard use rather than resale as wearable footwear.
Sellers often treat these grades as rough percentage shares of deadstock value, a useful pricing heuristic rather than a fixed formula. Rarity can override all of it. A scarce model in fair condition can still command a strong price because collectors will restore or simply accept the imperfections to own the piece.
2. Run the exterior and packaging checklist
Start outside the shoe, since exterior wear sets the honest ceiling for whatever grade you land on. Outsole tread and heel drag are the most reliable indicators of real wear, more telling than a wiped-down upper.
- Check the outsole for tread depth, heel drag, and any separation between sole layers.
- Examine the upper for creasing, cracking, delamination, or glue stains bleeding through the material.
- Run a finger along seams and stitching, checking heel counters and eyelets for fraying or pulled threads.
- Test fastenings, laces, and hardware for stiffness, breakage, or missing pieces.
- Photograph and note the box, hang tags, and laces as a separate condition line from the shoe itself, since a torn box does not lower a shoe’s grade but does affect the full-set price.
Pro Tip: Photograph the outsole flat against a ruler or coin for scale before you touch the upper, since tread wear is the detail buyers scrutinize first and dispute most often.
3. Inspect the interior where grades are actually decided
The inside of a vintage shoe fails long before the outside shows it, which is why interior inspection often determines the final grade regardless of how clean the upper looks. Treat the lining, insole board, and footbed as three separate defect zones.
- Lining: check for tearing, staining, or peeling fabric along the heel and tongue.
- Insole board: press firmly and flex it to check for softness, cracking, or crumbling.
- Footbed: look for compression, odor, or a replacement that does not match the original material.
The crumble or hydrolysis test is simple: flex the insole and midsole area and check for powdering or flaking. A crumbling insole board caps the grade at fair or lower regardless of upper condition, since structural failure in foam or polyurethane components limits real-world wearability no matter how the shoe photographs.
Photograph any crumbling with a close, well-lit shot and note whether an odor is present or whether a footbed has been swapped. A shoe with a pristine upper and a crumbling insole board should be listed and priced as if the crumbling insole were the shoe’s defining feature, not a footnote.

4. Watch for material and era red flags
Certain materials fail predictably, and knowing which ones lets you anticipate problems before you even flex the shoe. Polyurethane midsoles and insoles are the biggest risk. Hydrolysis breaks down polyurethane over time, and flexing plus checking for powdering is the standard way to catch it before a buyer does.
- Polyurethane hydrolysis: detected by flexing the sole and looking for crumbling or a chalky residue, and it caps the grade once present.
- Glue and adhesive failure: shows as separation between layers, distinct from cosmetic yellowing, which is a surface discoloration that does not affect structure.
- Vegetable-tanned leather: older leathers can develop red rot, a form of irreversible fiber breakdown, and conservators advise against routine conditioning with products like saddle soap on historic leathers because some dressings accelerate the damage.
Shoes from the 1970s through the 1990s are more likely to carry polyurethane midsoles nearing the end of their functional life, while older leather uppers from earlier decades carry a higher red rot risk if they were poorly stored.
5. Follow a repeatable workflow for pairs and lots
A consistent process matters more than any single rule. Work in the same order every time so nothing gets skipped under time pressure.
- Set up a well-lit workspace and take a full photo set: outsole, upper from three angles, interior close-ups, and the box or laces.
- Inspect exterior components first, then move to the interior and run the crumble test.
- Assign the grade based on the single worst defect found, not an average of good and bad points.
- Log the grade, defect notes, and a status: resell, repair, restore, or scrap.
For wholesale lots, inspecting every pair individually is rarely practical. Statistical sampling methods such as ISO 2859-1 acceptable quality limit sampling let you estimate a batch’s overall quality from a representative sample rather than checking 100% of the lot, which keeps grading fast without sacrificing reliability.
| Lot size | Suggested sample size | Use case |
|---|---|---|
| — | Full inspection | Small resale batches |
| — | Statistical sample per AQL tables | Mixed wholesale lots |
| — | Statistical sample, tiered by defect severity | Bulk export lots |
When in doubt, grade down. A slightly conservative grade rarely triggers a dispute, while an optimistic one almost always does.
6. Photograph and disclose defects the right way
Clear documentation protects both sides of a sale. Buyers who feel surprised by a defect are the source of most return requests.
- Include interior close-ups showing any crumbling, staining, or odor alongside the standard exterior shots.
- Write condition notes that name the limiting defect directly rather than burying it in generic language.
- List box and lace condition separately from the shoe’s grade, since replacements should be noted as replacements, not implied as original.
- Flag pairs needing restoration clearly, using labels like “restoration required” or “for parts” when structural issues limit wearability.
Pro Tip: Lead your listing description with the defect that caps the grade, since buyers scan for exactly that detail and trust sellers who state it upfront.
7. What bulk inspection at scale teaches you about grading
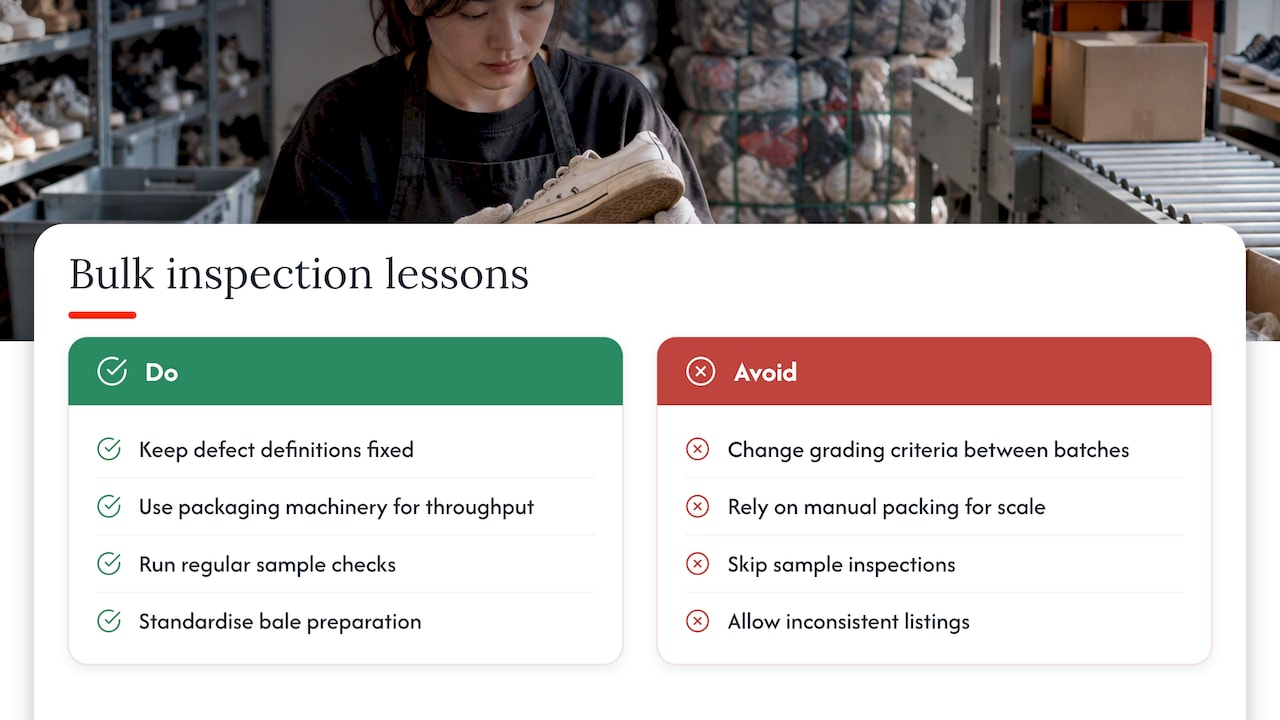
Grading a single pair is one thing. Grading thousands consistently is another. The company operates from a large warehouse and ships used footwear and other secondhand goods internationally, which means consistent, repeatable inspection standards are a daily operational requirement rather than a one-off exercise. Packaging machinery supports fast turnaround on sample checks and bale preparation, and that pace only works when defect definitions stay fixed across every batch, reducing the listing risk that inconsistent grading creates for retail partners.
8. Where to source inspected vintage shoe lots
If you resell footwear rather than grade single pairs for a personal collection, sourcing already-sorted bulk lots saves the hours that individual inspection demands. Bulk used shoes are supplied to retailers, resellers, and market traders who need volume without doing every crumble test themselves.
- Retailers restocking shelves benefit from consistent bale quality across large orders.
- Resellers building online listings get a steady supply to grade and price using the ladder above.
- Market traders sourcing mixed footwear lots can order at the volume their stalls require.
Visit the used shoes page for sample policies and ordering details.
9. Why conservative grading protects every sale
Grading is a trust exercise more than a technical one. Pick one ladder, apply its definitions the same way every time, and resist the urge to round up because a shoe looks better in photos than it will in a buyer’s hands. Bulk handlers who balance speed with a genuine interior check are the ones who avoid disputes at scale, and that habit scales down just as well to a single pair sold from a closet.
— rodrigues
10. Primary sources and further reading
The interior inspection protocol and crumble test come from GradeThread’s grading guide. The condition ladder and outsole-first approach draw on Ardent Workshop’s sneaker grading overview. Material failure modes are detailed in The Sneaker Savant’s collectible condition guide, leather care cautions come from the National Park Service’s conservation appendix, and batch sampling logic follows SATRA’s inspection guidance.
Sources
- How to Grade Vintage Shoe Interior Condition | GradeThread
- What is Sneaker Condition Grading? | Ardent Workshop
- The Complete Guide to Collectible Sneaker Condition — The Sneaker Savant
- Appendix S: Curatorial care of objects made from leather and skin products
- Statistical sampling and footwear inspection guidance (SATRA)
FAQ
What are the grades of shoes?
The common market ladder runs deadstock, very near deadstock, excellent, good, fair, heavy wear, and beater. Each grade reflects a range of wear rather than a single fixed standard, so sellers should state their own criteria alongside the label.
What qualifies as vintage shoes?
Vintage generally refers to footwear old enough to show age-appropriate character such as gentle fading or patina, distinct from a reproduction or retro release made to resemble an older style. Graders need to tell natural aging apart from structural damage before assigning a grade, since patina is often desirable while damage is not.
What is B grade footwear?
“B grade” is not a standardized industry term and definitions vary by seller or platform. It generally describes footwear with noticeable but non-structural wear, comparable to what the excellent or good rungs of the seven-grade ladder capture, though a buyer should always confirm the seller’s specific definition before purchase.
Can you get shoes graded?
There is no single central grading authority for vintage footwear the way there is for coins or trading cards. Sellers typically grade their own inventory using a published ladder like the one above, and buyers rely on the seller’s photos and disclosed defects rather than a third-party certificate.